Porcelain Tile Installation: The Complete Guide for Bathroom Renovations
If you’re planning a bathroom renovation, porcelain tile installation is the single decision that determines how your bathroom looks, performs, and holds up — for the next 20 years. Get it right and you have a floor and shower that never needs replacing. Get it wrong and you’re looking at cracked tiles, failed grout, and moisture getting where it was never supposed to go.
This guide covers everything you need to know — material selection, sizing, the installation process step by step, cost breakdown, and the mistakes that cause most porcelain tile installations to fail before they should. We’ve installed porcelain tile in hundreds of bathrooms across the Bronx, Yonkers, White Plains, and Westchester County since 2019. This is what we know from actually doing it.
Why Porcelain Tile Is the Right Choice for Bathroom Installation
Porcelain is not the same as ceramic. It’s made from denser clay, fired at higher temperatures, and the result is a tile with a water absorption rate below 0.5% — which is why the Tile Council of North America (TCNA) classifies it as fully impervious. In a bathroom, that’s not a feature. That’s the whole point.
Ceramic absorbs more water. Natural stone requires sealing. Vinyl can’t be refinished. Porcelain tile installation is the standard for bathrooms because it outperforms every alternative in the environment bathrooms create — daily water exposure, temperature swings, and constant foot traffic.
| Material | Water Absorption | Durability | Maintenance | Best For |
|---|---|---|---|---|
| Porcelain | <0.5% (impervious) | Excellent | None required | Floors, walls, showers |
| Ceramic | 0.5–3% | Good | Grout sealing | Walls, low-traffic floors |
| Natural Marble | Variable | Moderate | Annual sealing | Accent walls, light use |
| Luxury Vinyl | Waterproof surface | Moderate | Low | Budget remodels |
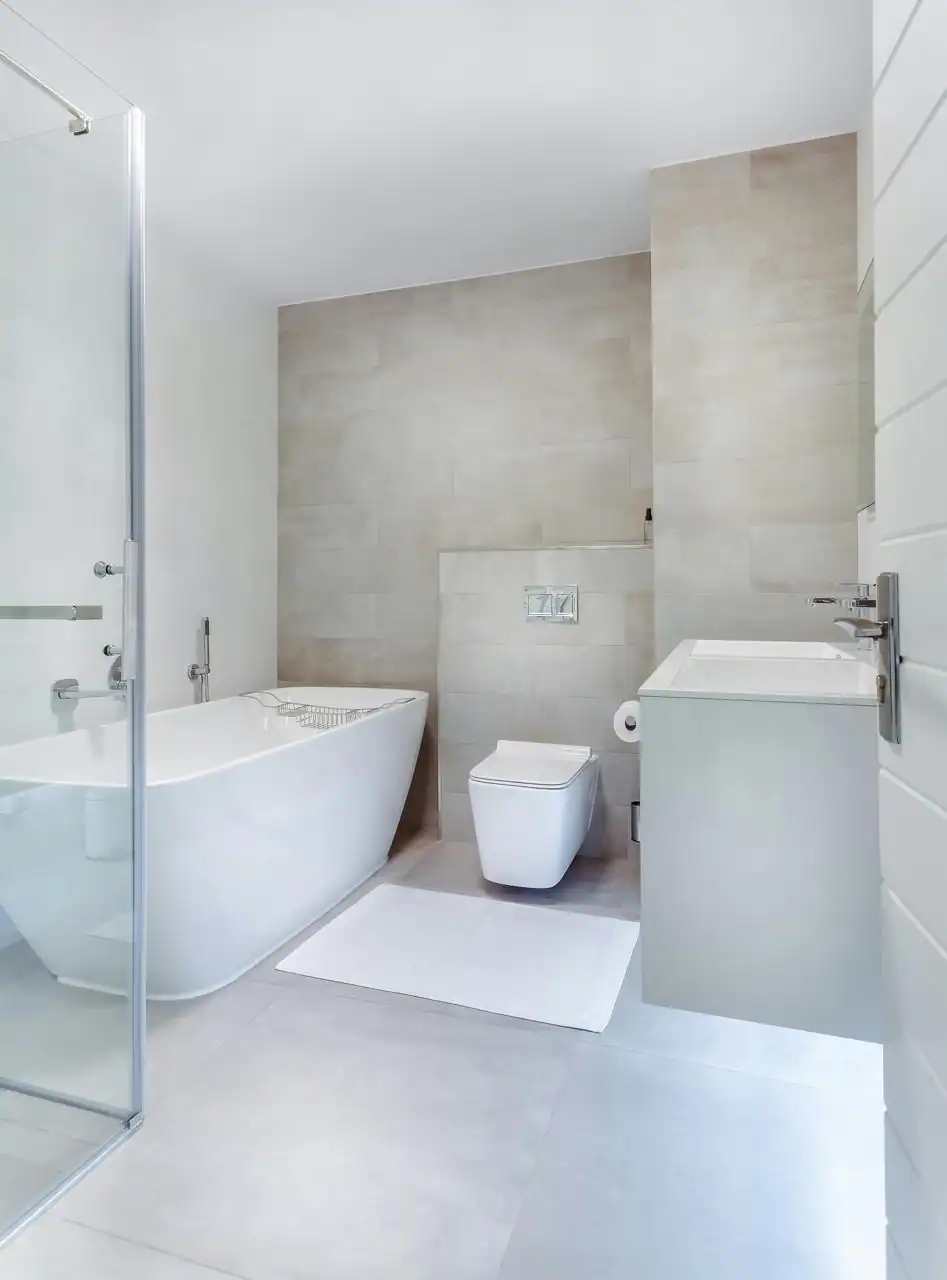
Porcelain Tile Sizes — What Works Where
Tile size is not an aesthetic choice alone — it’s a technical decision. The wrong size in the wrong location creates installation problems and a finished product that looks off.
| Size | Best Application | Key Consideration |
|---|---|---|
| 2″×2″ / 3″×3″ mosaic | Shower floors | Maximum slip resistance, conforms to slope |
| 4″×12″ / 4″×16″ | Shower walls, accent bands | Versatile, works in any pattern |
| 12″×24″ | Bathroom floors, shower walls | Makes small spaces feel larger, fewer grout lines |
| 24″×24″ | Master bath floors, open showers | Requires perfectly flat subfloor — no shortcuts |
| 32″×32″ and up | Large master bathrooms | High-end look, significant subfloor prep required |
Large format porcelain tile (24×24 and above) requires a subfloor that is flat to within 1/8″ over 10 feet per TCNA standards. In older homes and apartment buildings — especially in the Bronx — this flatness almost never exists out of the box. We self-level every floor before large format porcelain tile installation. Skip that step and the tile edges will lippage, the tiles will crack, and the grout joints will fail. No exceptions.
The Porcelain Tile Installation Process — Step by Step
Most homeowners have no idea what’s actually happening when a tile crew is in their bathroom. Here’s the complete process for a professional porcelain tile installation — floor and shower walls.
-
1Demo and substrate inspection
Remove existing tile, flooring, or wall surface. Inspect the subfloor and wall substrate for damage, rot, moisture, and flatness. Any structural or moisture issue found here gets resolved before anything else happens.
-
2Subfloor preparation and leveling
Self-leveling compound is applied to bring the floor within TCNA flatness tolerances. This is the step most contractors skip because it adds time and cost. It’s also the step that determines whether your tile installation lasts 5 years or 25.
-
3Waterproofing membrane
On shower walls and floors, a waterproofing membrane — Schluter Kerdi, RedGard, or equivalent — goes on before any tile. This is what actually keeps water from reaching the framing. Cement board alone is not waterproof. Anyone who skips the membrane is setting up a moisture failure inside your wall.
-
4Layout planning
Snap chalk lines, dry-lay tiles to check pattern and cuts before adhesive goes down. This is where the visual outcome is determined — starting in the wrong corner creates small awkward cuts in visible locations.
-
5Mortar bed and tile setting
Large format porcelain tile installation uses polymer-modified thin-set applied with a notched trowel — back-buttered on each tile as well for full coverage. Full coverage means 95%+ contact between tile and mortar. Hollow spots cause cracking and tile failure under foot traffic.
-
624–48 hour cure
Thin-set needs time to cure before grouting. Walking on freshly set tile or grouting too early shifts tiles and kills the bond. This is a waiting period that cannot be rushed.
-
7Grouting
Unsanded grout for joints under 1/8″. Sanded for anything wider. Epoxy grout in wet areas like shower floors for maximum stain and water resistance. Grout color is a design decision — dark grout hides staining over time, light grout stays clean-looking when maintained.
-
8Sealing and cleanup
Grout sealing on non-epoxy installations. Final cleanup, caulk at all transitions and corners — never grout at a change of plane. Caulk accommodates movement. Grout at a corner cracks. Every time.
“The tile is the last thing to go in and the first thing the homeowner sees. But the work that determines whether that tile lasts happens before a single tile is set — subfloor prep, waterproofing, full mortar coverage. That’s where a professional porcelain tile installation separates from one that fails in three years.”
— Hysni Dogjani, AlbStar Renovation LLC
Need Porcelain Tile Installation? Let’s Talk.
Free on-site estimate — we assess your subfloor, discuss tile options, and give you a written number. No obligation.
📞 Call (646) 645-4577Porcelain Tile Installation Cost — Real Numbers
Every tile contractor quotes differently, so here’s how to read a porcelain tile installation quote and know whether it’s honest.
| Cost Component | What Drives It | Typical Range |
|---|---|---|
| Labor — floor tile | Tile size, pattern complexity, subfloor condition | $8–$16 / sq ft |
| Labor — shower walls | Tile size, niche cuts, pattern | $10–$18 / sq ft |
| Porcelain tile material | Size, finish, brand | $2–$12 / sq ft |
| Subfloor leveling | Existing flatness, square footage | $300–$900 |
| Waterproofing membrane | Shower size, product used | $400–$900 |
| Demo of existing tile | Layers, adhesive type, disposal | $400–$1,200 |
| Full bathroom install (floor + shower) | All-in, typical Bronx/Yonkers bathroom | $3,500–$9,000 |
A quote that doesn’t line-itemize waterproofing and subfloor prep is a quote that’s hiding where the cut corners are. Ask directly: what waterproofing system are you using in the shower? What’s your process for subfloor leveling? If the answers are vague, you have your information.
The 5 Most Common Porcelain Tile Installation Failures — And Why They Happen
1. Tile cracking along grout lines. Cause: hollow spots from insufficient mortar coverage or a subfloor that flexes. Fix: full mortar coverage (95%+) and a structurally sound subfloor before installation starts.
2. Grout cracking at corners and edges. Cause: using grout instead of caulk at changes of plane. Grout is rigid. Movement cracks it. Fix: caulk at every inside corner, every wall-to-floor transition, every change of plane.
3. Moisture in the wall behind the shower. Cause: no waterproofing membrane, or cement board treated as the waterproofing layer. Cement board is not waterproof. Fix: Schluter Kerdi, RedGard, or foam shower system before any tile goes on.
4. Tile lippage on large format installations. Cause: uneven subfloor + large tile. The tile bridges low spots and high spots, creating uneven edges you feel underfoot and see in raking light. Fix: self-leveling compound before installation, no exceptions on large format.
5. Grout staining and discoloration. Cause: no grout sealer on non-epoxy grout in a wet area. Grout is porous. Unsealed grout in a shower absorbs soap scum, mineral deposits, and mildew. Fix: seal grout on installation, reseal annually, or use epoxy grout in wet zones from the start.
Porcelain vs. Ceramic Tile Installation — What’s the Actual Difference
Both are installed the same way — thin-set, grout, same tools. The difference is in the material itself and where each belongs.
Ceramic is less dense, absorbs more water, and is easier to cut. That makes it fine for bathroom walls in low-moisture areas and backsplashes. It’s also less expensive. For a budget bathroom where the walls stay dry — ceramic works.
Porcelain is denser, harder, and impervious to water. It’s heavier, harder to cut, and more expensive. For shower floors, shower walls, and bathroom floors that get daily water exposure — porcelain tile installation is the professional standard. The cost difference between ceramic and porcelain tile materials on a typical bathroom is $200–$600. The difference in long-term performance is significant.
Porcelain Tile Finishes — Matte vs. Polished vs. Textured
Polished porcelain has a high-gloss surface that reflects light and makes a space feel larger. It also shows water spots, soap residue, and footprints more readily and is slippery when wet. Best for walls and dry-area floors.
Matte porcelain hides surface imperfections and water marks, is easier to maintain, and provides better traction. The go-to finish for bathroom floors and shower floors.
Textured porcelain — wood-look, stone-look, or grip-surface tiles — adds slip resistance and visual character. The most practical choice for shower floors where grip matters and water is constant.
For most bathrooms: matte or textured on floors, polished or matte on walls. Mixing finishes — matte floor, polished wall tile — is a standard combination that works in any size bathroom.
Ready to Start Your Porcelain Tile Installation?
We serve the Bronx, Yonkers, White Plains, Scarsdale, and all of Westchester County. Free on-site estimate — no pressure, no obligation.
Get Your Free Estimate →Frequently Asked Questions — Porcelain Tile Installation
How long does porcelain tile installation take in a bathroom?
What does porcelain tile installation cost?
Is porcelain tile good for bathroom floors?
What size porcelain tile is best for a small bathroom?
Does porcelain tile installation require permits?
Can porcelain tile be installed over existing tile?
Ready to Start Your Bathroom Renovation?
No obligation. No sales pressure. Just an honest conversation about your project and what it would actually cost.
Helpful resources: Tile Council of North America · National Kitchen & Bath Association · NYC Department of Buildings
📍 65 Bajart Pl, Yonkers, NY 10705
Serving: Yonkers · The Bronx · White Plains · Scarsdale · Queens · Westchester County
Leave a Reply